Nano Point Scanner
when microscopy meets metrology
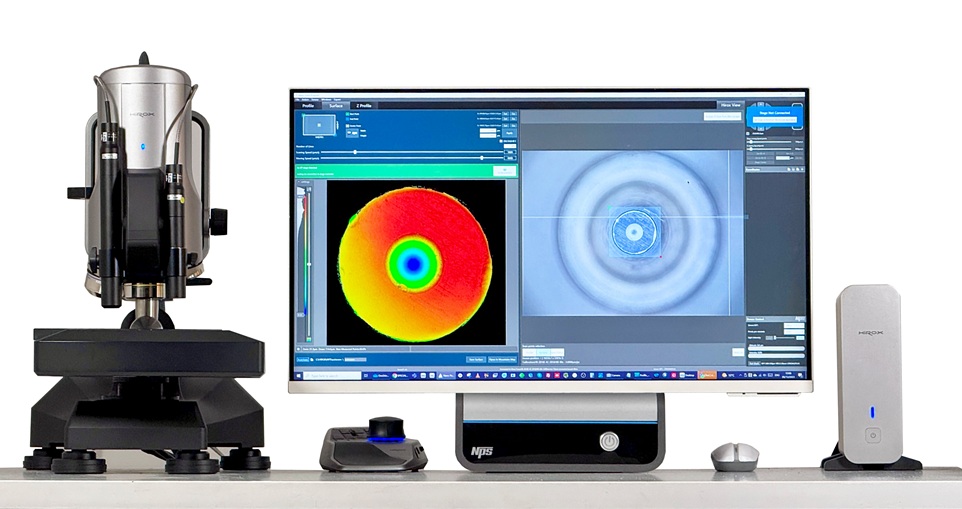
The NPS is a white light confocal point sensor combined with an high precision motorized stage.
It enables submicron altitude measurement on any type of surface without any contact on the sample.
High Speed Profile
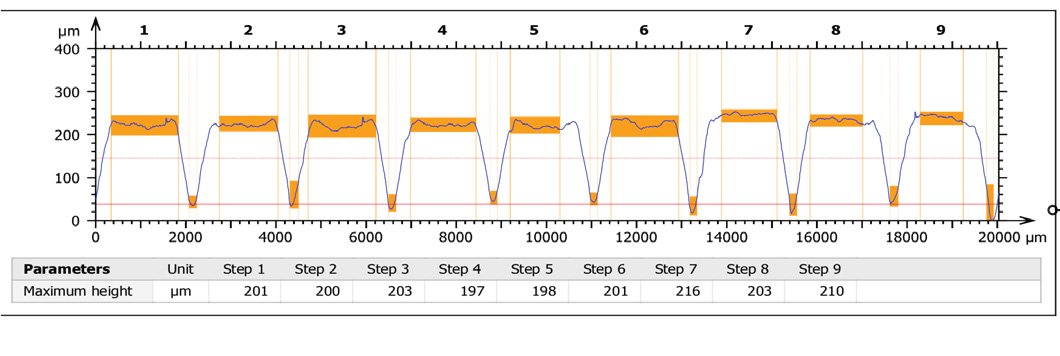
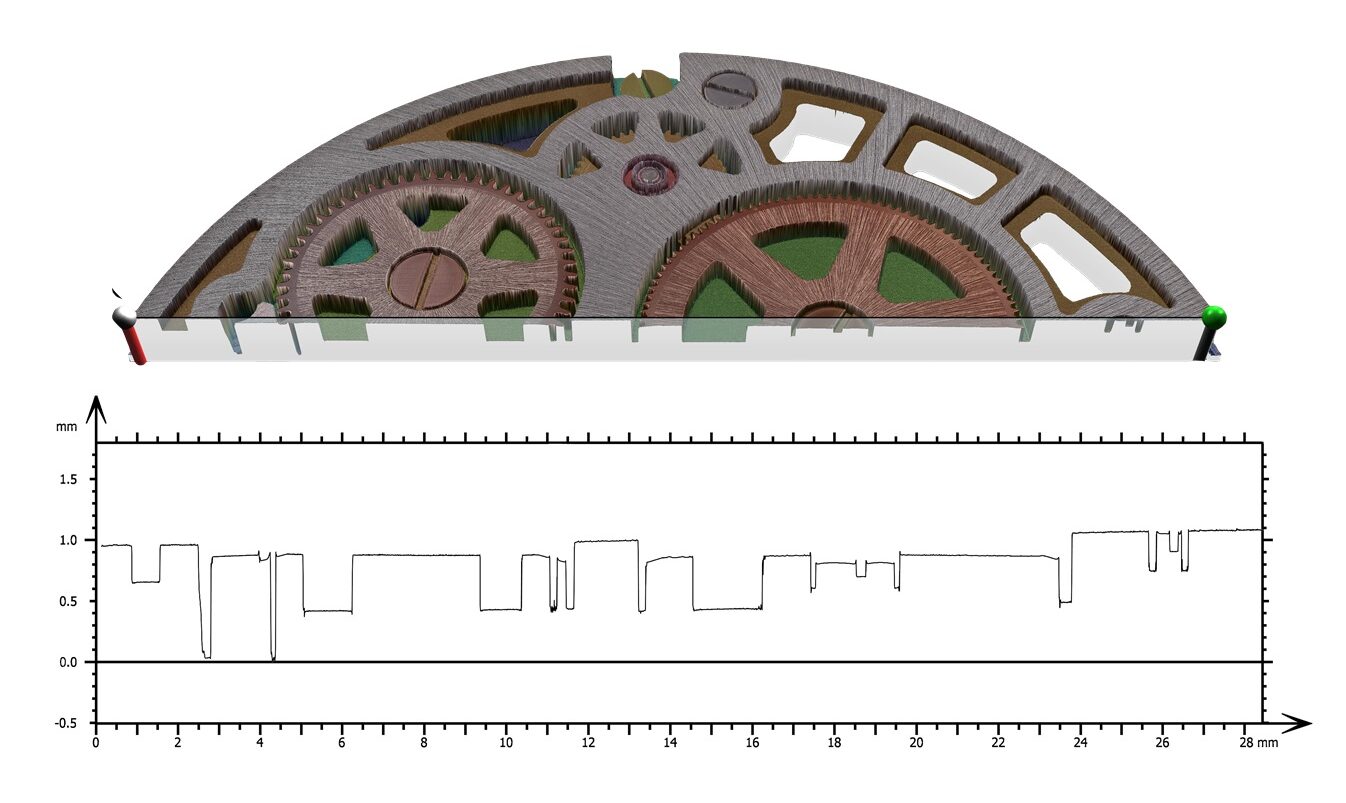
By moving the sample with the high precision motorized XY stage in one axis, the NPS acquires a series of focused points at a chosen interval, creating a fast profile: the measurement of height, distance, radius, line roughness (Ra, Rz, Rt,…) and much more can be done within seconds!
High Resolution Surface
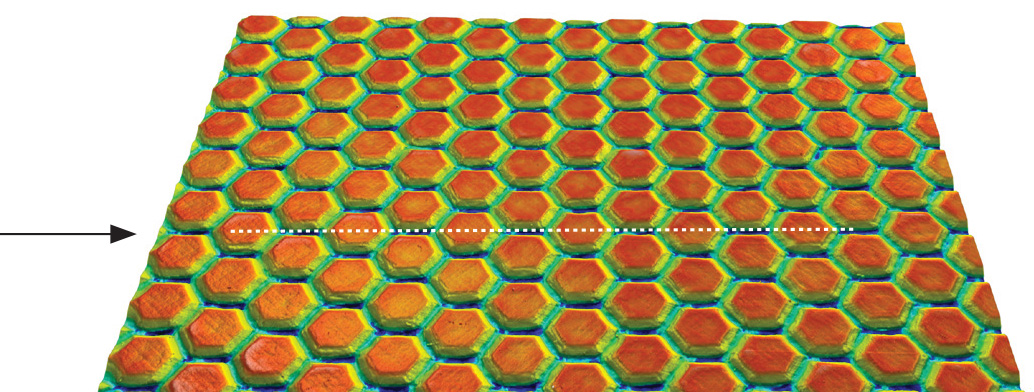
By creating a series of aligned profiles, the NPS acquires XYZ information creating a high resolution 3D surface: volume, surface roughness (Sa, Sz,…), complex shape, 3D waviness and much more can be measured – the duration of the scan is adjusted by the amount of lines, scanning speed and the dimension of the sample!
Works On Any Type Of Surface

The confocal system generates a sharply focused observation plane. Points located above or below the object surface are completely out of focus, so that the type of material does not matter: the sample can be mirror, shinny, reflective or rough, it can be opaque or completely transparent.
ISO Certified measurement

ISO 25178-602: White light chromatic confocal technology is ISO certified for roughness measurement and is currently used by many companies and research centers all over the world. The NPS allows high precision XYZ axis measurement beyond the limitation of optical depth of field.
White Light Confocal Measurement
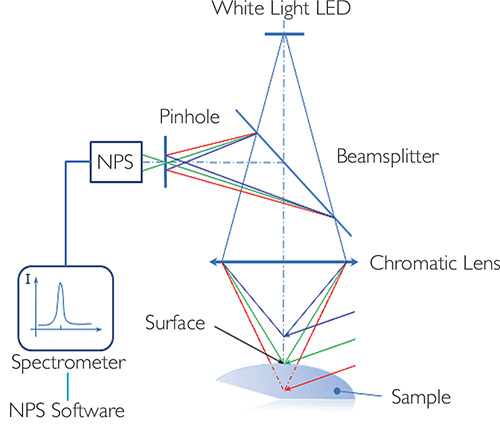
The NPS is an innovative non-contact confocal 3D profilometer measuring altitude in real time, for profile or surface scanning:
- The white light LED beam is projected through a beamsplitter
and a chromatic lens to the surface of the sample - The reflected light beam from the sample is filtered in a
confocal pinhole, isolating one single wavelength in perfect focus - The NPS spectrometer is accurately translating this wavelength
into height information and display it visually in the NPS software - Up to 2000 height information per second are acquired in
real time creating a profile when moving the XY stage
You can select between two modes: Profile or Surface

A wide range of measurement capabilities
By combining high precision measurements with advanced metrology software, the NPS will match all your metrology requierements
PROFILE & MULTI PROFILE
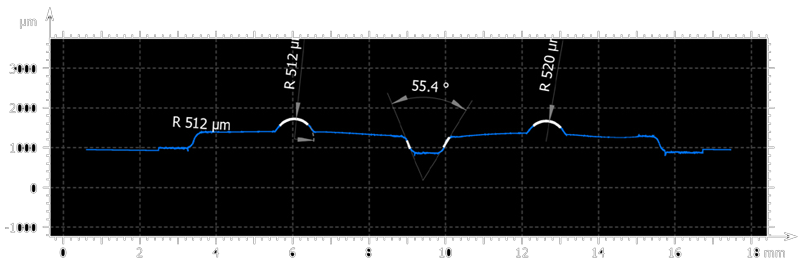
The fastest way to execute a measurement! After scanning between two points, the NPS will display the profile: you can then adjust the level, measure horizontal & vertical distances as well as Ra, Rz and Rt measurements. For advanced measurement, select the desired Hirox Map template inside the NPS menu. With the new programable multi profile function, simply execute several individual profiles combined in one single report
SHAPE & FORMS
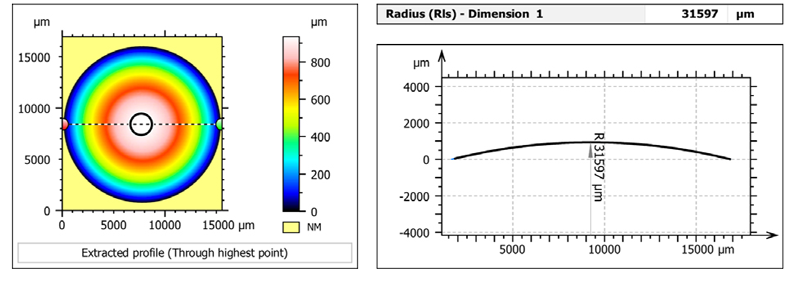
Surface shape and geometry can be easily measured: on a spherical object, the measurement results of a curvature can be compared to manufacturing specification for example. Other shapes such as lines, planes, spheres, cylinders or freeform are typical objects that the NPS can measure: length, height, radius, angle, volume and much more. With large measuring ranges up to 4000 micrometer, various shape and forms can be captured and measured.
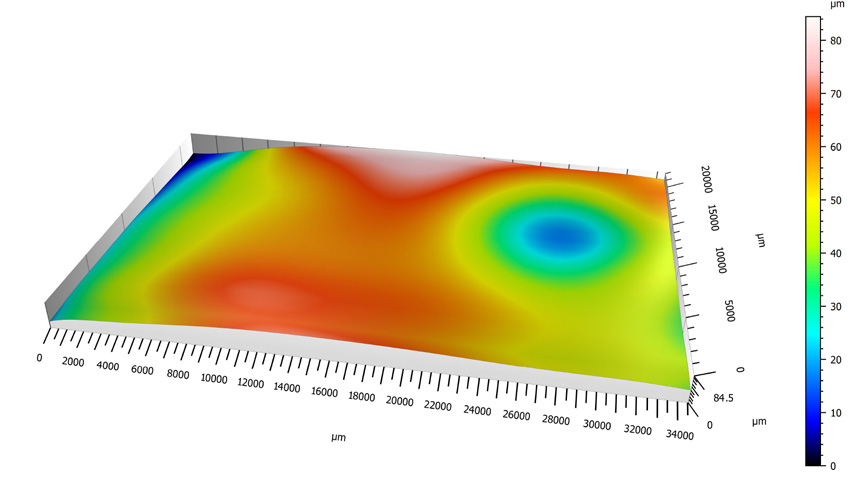
FLATNESS, WAVINESS & COPLANARITY
Warp, Deformation, Waviness, or Flatness are easily measured on large areas with the Nano Point Scanner! Thanks to XY stage up to 500x500mm, it’s possible to measure defects that can occur from machine or work anomaly, residual stress, vibrations, or heat treatment for example.
Coplanarity is another parameter that required long distances and high level of Z accuracy. This can be done either thanks to a profile or a surface.
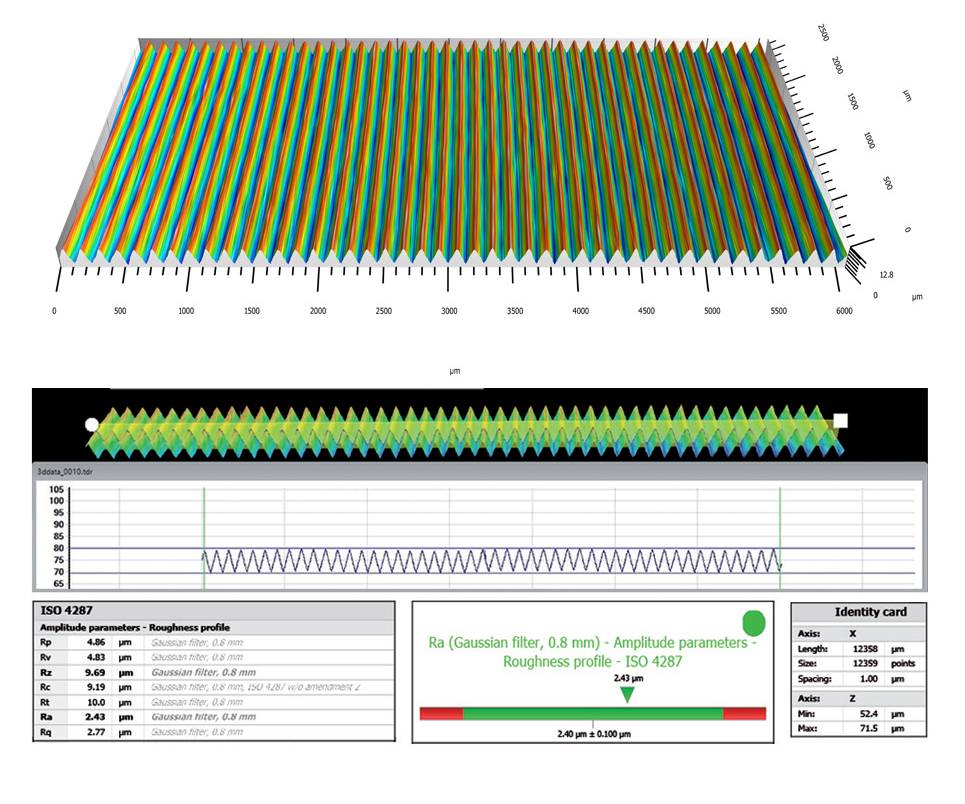
ROUGHNESS, TEXTURE & DEFECTS
Surface metrology determines surface topography, which is essential for confirming a surface’s suitability for its function. Surface measurement includes profile roughness (Ra), surface roughness (Sa), surface texture, asperity and structural characterization.
For manufacturing and design purposes, measurement is critical to ensure that the finished material meets the design specification.
- Distances
- Roughness
- Roundness
- Flatness
- Deformation
- Volume
- Waviness
- Topography
- Coplanarity
- Tribology
The NPS Sensors
The right sensors for your requirements
The NPS System provides a wide range of sensors to achieve seamless highly accurate measurement. Depending on your application, you can select the best sensors for your needs: small measuring range for highest accuracy and roughness measurement or large measuring range for tall sample and form measurements.
 |  |  |  |  |  |  |  |  |
||
*Height accuracy depending on XY stage precision (please contact us to know more about stages)
More NPS Sensors are available – featuring more specifications in terms of measuring range, working distance and inspection possibilities!
Powerful Measurement and Reporting System
Using the most advanced metrology software, the NPS System lets you make reports with precise measurement the easiest way
Take advantage of the Best Metrology software
The Digital Surf technology is the most advanced
metrology solution on the market:
- Real time imaging of 3D surface topography
- 3D surface overlays for fast feature location: height
color + intensity images from the NPS combined - Remove data acquisition and sample artifacts
- Extraction of area, Level correction, Shape Correction
- Full measurement suite on profiles and 3D data with
user and process tracability
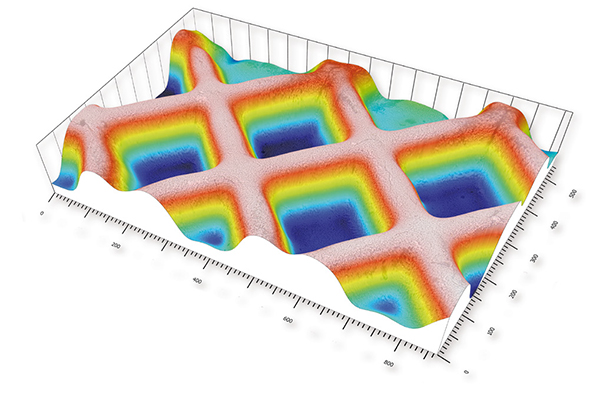
Easy Reporting
- Easy integration into lab and production environments export of all numerical results.
- Easy publication – export analysis documents, pages
and individual images up to 1200 dpi.
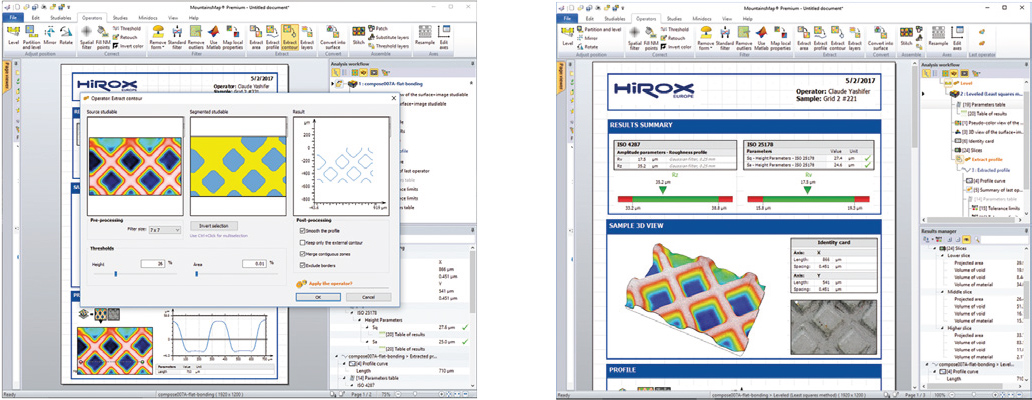
Analysis Automation
Powerful automation tools ensure high productivity: series of surface data sets can be analyzed automatically and common sequences of analysis step can be saved for insertion any future analysis document.
Pass/fail criteria can be specified for any parameter and green (pass) / red (fail) «traffic lights» are displayed automatically on the report. Alll the results can be extracted as CSV / Excel format
Unlimited Applications
- Aerospace
- Watch Makers
- Mobile Phone
- Art Restauration
- Automotive
- Semiconductor
- Displays
- Security Printing
- Optical Lens
- Micro Electronics
- Archeology
